
This weekend I decided to take another look at Stackpath and their workload edge compute features. This is a relatively new feature, in fact, I wrote about it in Feb 2109 when it was just released. I remember being quite enthusiastic about the potential but also observed some things that were lacking back then. Now, one and a half years later, it seems most of those have been resolved, so let’s take a look!
I’ve decided to experiment with adding a small demo video to these blogs.
Below you will find a quick 5min demo of the whole setup. Since these videos are new and a bit of an experiment, let me know if you like it.
Workloads
Stackpath support two types of workloads (in addition to serverless), VM and container-based deployments. Both can be orchestrated using API’s and Terraform. Terraform is an “Infrastructure as code” tool. You simply specify your intent with Terraform, apply it, and you’re good to go. I’m a big fan of Terraform, so we’ll use that for our test.
One of the cool things about Stackpath is that they have built-in support for Anycast, for both their VM and Container service. I’m going to use that feature and the Container service to build this highly available, low latency web service. It’s super easy, see for your self on my github here.
Docker setup
Since I’m going to use the container service, we need to create a Docker container to work with. This is my Dockerfile
FROM python:3
WORKDIR /usr/src/app
COPY ./mywebserver.py .
EXPOSE 8000
ENV PYTHONUNBUFFERED 1
CMD [ “python”, “./mywebserver.py” ]
The mywebserver.py program is a simple web service that prints the hostname environment variable. This will help us determine which node is servicing our request when we start our testing.
After I built the container, I uploaded it to my Dockerhub repo, so that Stackpath can pull it from there.
Terraform
Now it’s time to define our infrastructure using terraform. The relevant code can be found on my github here. I’ll highlight a few parts:
On line 17 we start with defining a new workload, and I’m requesting an Anycast IP for this workload. This means that Stackpath will load balance (ECMP) between all nodes in my workload (which I’m defining later).
resource “stackpath_compute_workload” “my-anycast-workload” {
    name = “my-anycast-workload”
    slug = “my-anycast-workload”
    annotations = {
        # request an anycast IP
        “anycast.platform.stackpath.net” = “true”
    }
On line 31, we define the type of workload, in this case, a container. As part of that we’re opening the correct ports, in my case port 8000 for the python service.
container {
    # Name that should be given to the container
    name = “app”
    port {
        name = “web”
        port = 8000
        protocol = “TCP”
        enable_implicit_network_policy = true
    }
Next up we define the container we’d like to deploy (from Dockerhub)
# image to use for the container
image = “atoonk/pythonweb:latest”
In the resources section we define the container specifications. In my case I’m going with a small spec, of one CPU core and 2G of ram.
resources {
   requests = {
      “cpu” = “1”
      “memory” = “2Gi”
   }
}
We now get to the section where we define how many containers we’d like per datacenter and in what datacenters we’d like this service to run.
In the example below, we’re deploying three containers in each datacenter, with the possibility to grow to four as part of auto-scaling. We’re deploying this in both Seattle and Dallas.
target {
    name         = "global"
    min_replicas = 3
    max_replicas = 4
    scale_settings {
      metrics {
        metric = "cpu"
        # Scale up when CPU averages 50%.
        average_utilization = 50
      }
    }
    # Deploy these instances to Dallas and Seattle
    deployment_scope = "cityCode"
    selector {
      key      = "cityCode"
      operator = "in"
      values   = [
        "DFW", "SEA"
      ]
    }
  }
Time to bring up the service.
Now that we’ve defined our intent with terrraform, it’s time to bring this up. The proper way to do this is:
terraform init
terraform plan
terraform apply
After that, you’ll see the containers come up, and our anycasted python service will become available. Since the containers come up rather quickly, you should have all six containers in the two datacenters up and running in under a minute.
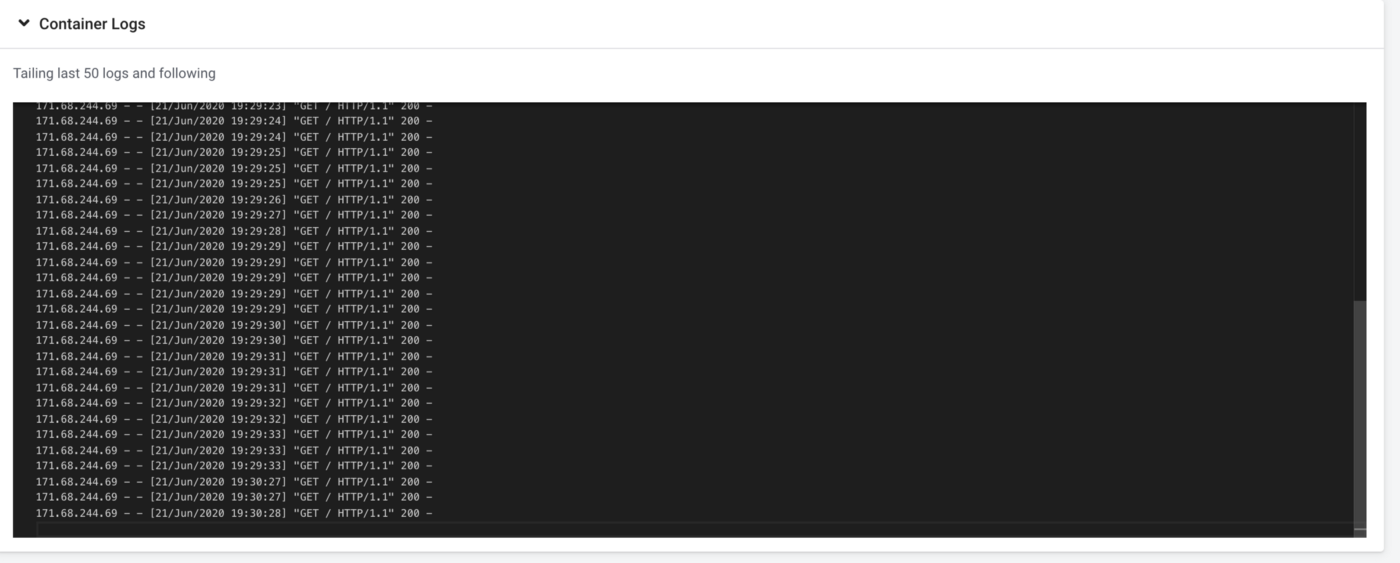
Testing the load balancing.
I’ve deployed the service in both Seattle and Dallas, and since I am based in Vancouver Canada, I expect to hit the Seattle datacenter as that is the closest datacenter for me.
$ for i in `seq 1 10`; do curl 185.85.196.41:8000 ; done

my-anycast-workload-global-sea-2
my-anycast-workload-global-sea-0
my-anycast-workload-global-sea-2
my-anycast-workload-global-sea-0
my-anycast-workload-global-sea-1
my-anycast-workload-global-sea-1
my-anycast-workload-global-sea-2
my-anycast-workload-global-sea-1
my-anycast-workload-global-sea-2
my-anycast-workload-global-sea-0
The results above show that I am indeed hitting the Seattle datacenter, and that my requests are being load balanced over the three instances in Seattle, all as expected.
In Summary
Compared to my test last year with Stackpath, there has been a nice amount of progress. It’s great to now be able to do all of this with just a Terraform file. It’s kind of exciting you can bring up a fully anycast service in under a minute with only one command! By changing the replicate number in the Terraform file we can also easily grow and shrink our deployment if needed.
In this article we looked at the container service only, but the same is possible with Virtual machines, my github repo has an example for that as well.
Finally, don’t forget to check the demo recording and let me know if you’d like to see more video content.