

In this blog, I’d like to introduce a new project I’m calling Mysocket.io. Before we dive in, a bit of background.
Loyal readers know I enjoy building global infrastructure services that need to be able to carry a significant amount of traffic and a large number of requests. Building services like these often require us to solve several challenges. Things to consider include: high availability, scaling, DDoS proofing, monitoring, logging, testing, deployments, user-facing & backend APIs, policy management (user preferences) and distribution, life-cycling, etc. All this while keeping an eye on cost and keeping complexity to a minimum (which really is human, operational cost).
To experiment with these topics, it’s necessary to have a project to anchor these experiments to. Something I can continuously work on, and while doing so, improve the project as a whole. Now, there are many projects I started over time, but one that I've worked most on recently, and wanted to share with a wider audience, is mysocket.io. A service that provides secure public endpoints for services that are otherwise not publicly reachable.

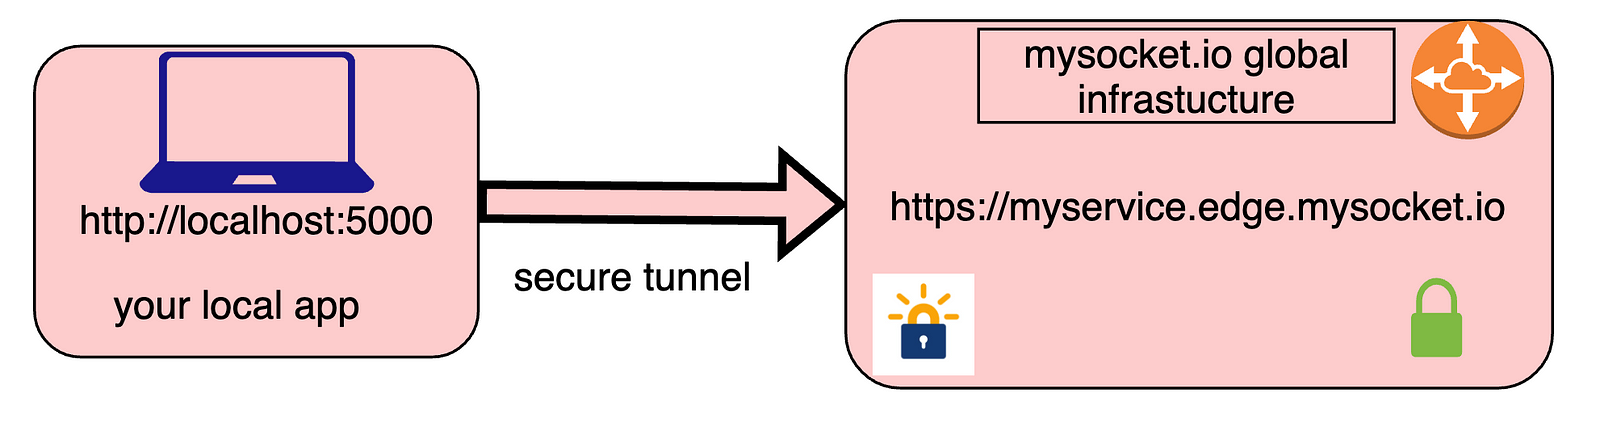
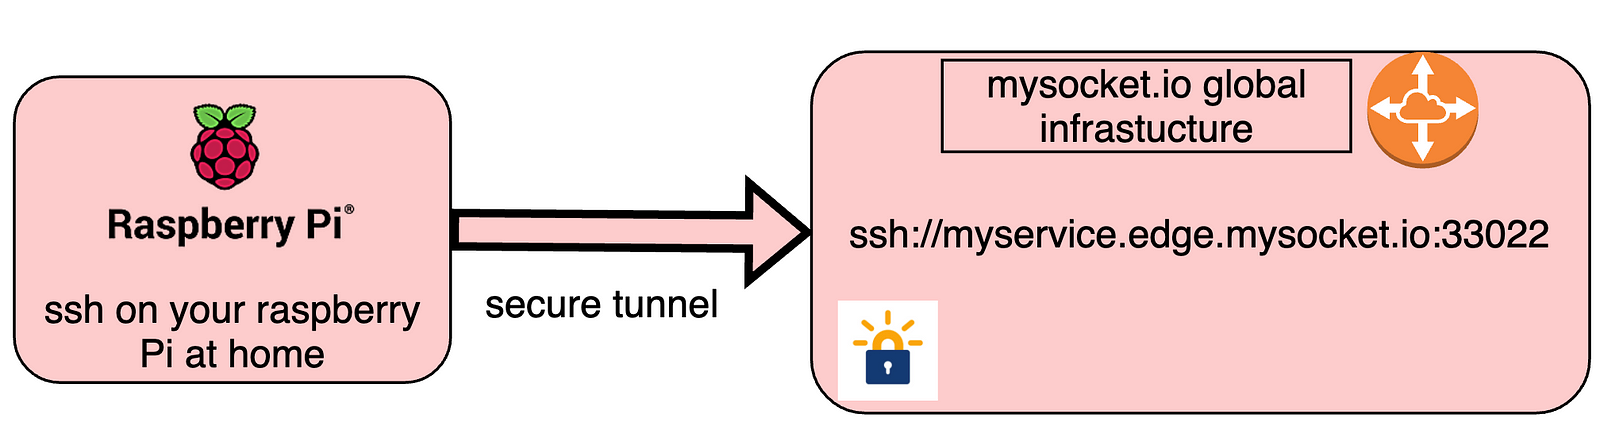
A typical example case that mysocket.io can help with is a web service running on your laptop, which you’d like to make available to a team member or client. Or ssh access to servers behind NAT or a firewall, like a raspberry pi on your home network or ec2 instances behind NAT.
More details
Alright, a good way to share more details and is to do a quick demo! You can see a brief overview in this video, or even better, try it yourself by simply following the four easy steps below.
If you’re interested or curious, feel free to give it a spin and let me know what worked or didn’t, or even better, how it can be improved. Getting started will take you just one minute. Just follow these simple steps.
#Install client, using python's package manager (pip)
pip3 install mysocketctl

#Create account
mysocketctl account create \
    --name "your_name" \
    --email "your_email_address" \
    --password "a_secure_password" \
    --sshkey "$(cat ~/.ssh/id_rsa.pub)"

#login
mysocketctl login  \
    --email "your_email_address" \
    --password "a_secure_password"


#Launch your first global socket ;)
mysocketctl connect \
    --port 8000 \
    --name "my test service"
Architecture overview
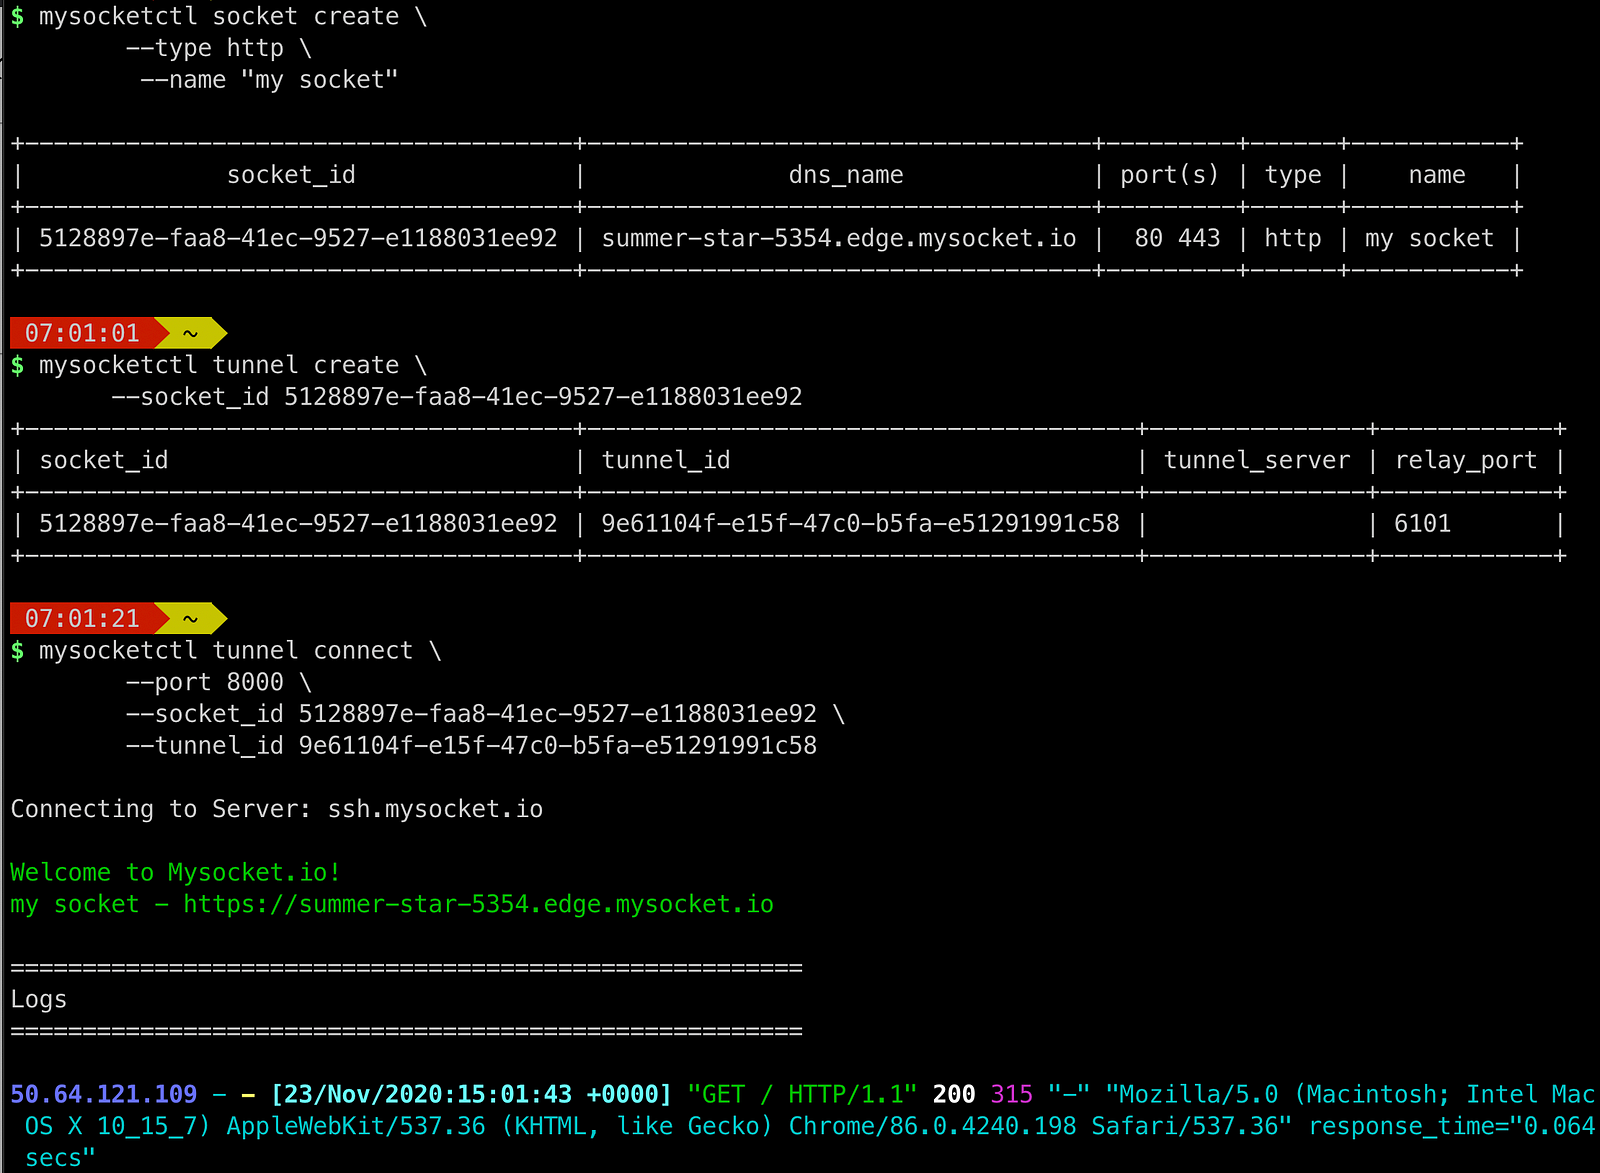
Ok, so how does it work? The process for requesting a “global socket” starts with an API call. You can do this by directly interfacing with the RESTful API, or by using the mysocketctl tool. This returns a global mysocket object, which has a name, port number(s), and some other information.
Users can now use this socket object to create tunnel objects. These tunnels are then used to connect your local service to the global mysocket.io infrastructure. By stitching these two TCP sessions together, we made your local service globally available.
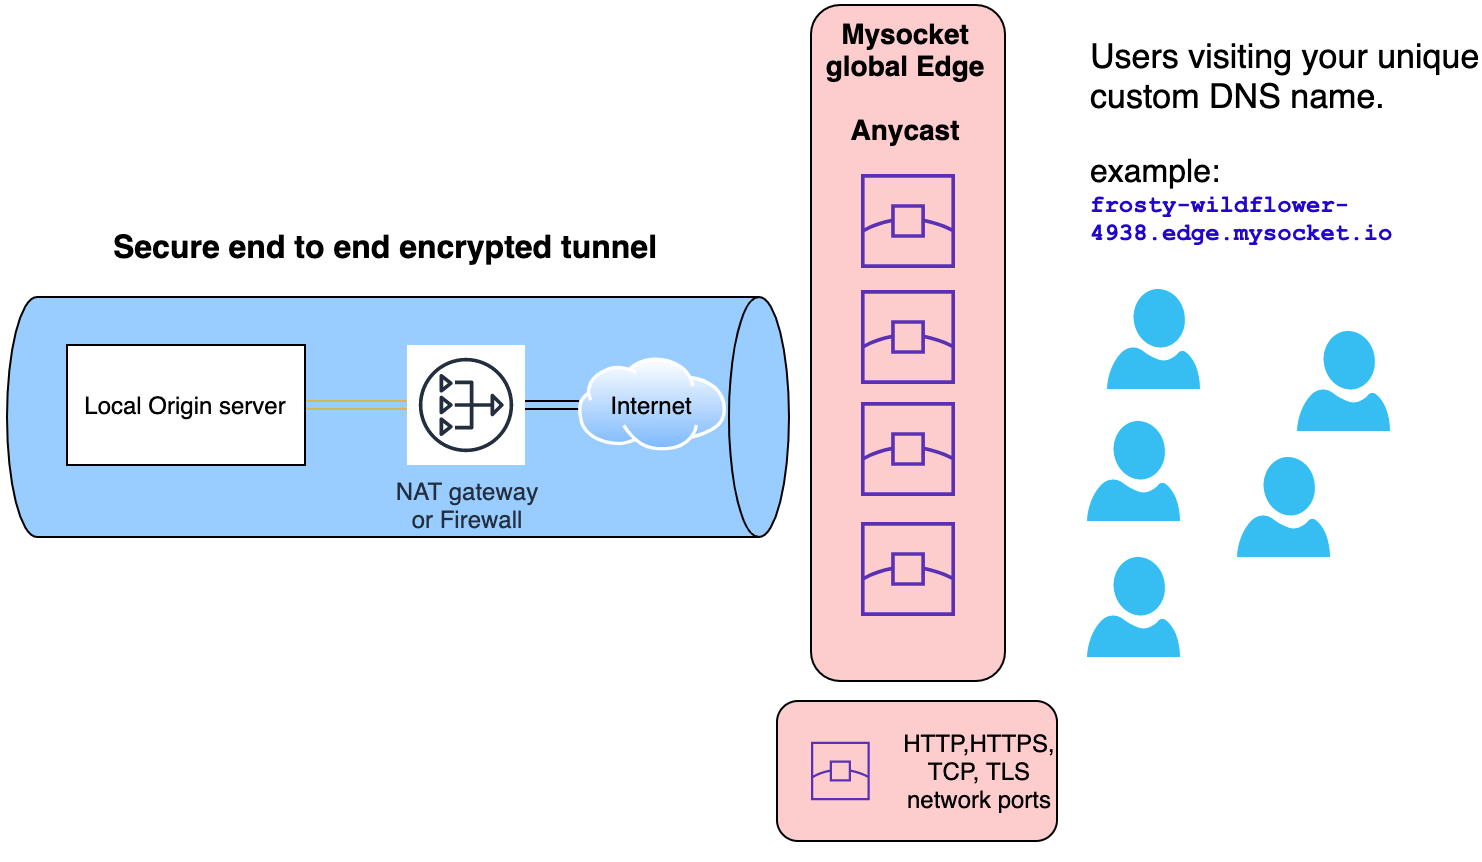
The diagram below provides a high-level overview of the service data-plane. On the left, we have the origin service. This could be your laptop, your raspberry pi at home, or even a set of containers in a Kubernetes cluster. The origin service can be behind a very strict firewall or even NAT. All it needs is outbound network access. We can then set up a secure encrypted tunnel to any of the mysocket.io servers around the world.
Anycast
The Mysocket.io services use AWS’ global accelerator. With this, I’m making both the tunnel servers and proxy services anycasted. This solves some of the load balancing and high availability challenges. The mysocket tunnel and proxy servers are located in North America, Europe, and Asia.
Once the tunnel is established, the connection event is signaled to all other nodes in real-time, ensuring that all edge nodes know where the tunnel for the service is.
Documentation
One of my goals is to make Mysocket super easy to use. One way to do that is to have good documentation. I invite you to check out our readthedocs.io documentation here https://mysocket.readthedocs.io/
It’s divided into two sections:
- General information about mysocket.io and some of the concepts.
- Information and user guides for the mysocketctl command-line tool.
The documentation itself and mysocketctl tool are both opensource so feel free to open pull requests or open issues if you have any questions.
You may have noticed there’s a website as well. I wanted to create a quick landing page, so I decided to play with Wix.com. They make it super easy; I may have gone overboard a bit ;) All that was clicked together in just one evening, pretty neat.
More to come
There’s a lot more to tell and plenty more geeky details to dive into. More importantly, we can continue to build on this and make it even better (ping me if you have ideas or suggestions)!
So stay tuned. That’s the plan for subsequent Blog posts soon, either in this blog or the mysocket.io blog.
Cheers,
-Andree