

Last week AWS had a major outage in its US-EAST1 region, lasting for most of the day, just before the big black Friday sales! Incidents like this are a great reminder of the importance of multi-region or even multi-cloud deployments for your services.
Depending on your “cloud maturity” and your products’ complexity, you may already be there or just getting started. Either way, in today’s blog, we will take a look at how we can use mysocket’s load balancing features to make deployments over multi-region easier.
A global load balancing service
In earlier blogs, we looked mostly at how the mysocket.io tunnel service can help securely connect your resources that may be behind NAT and firewalls to the Internet. In this article, we’ll look at Mysocket’s global load balancing feature.
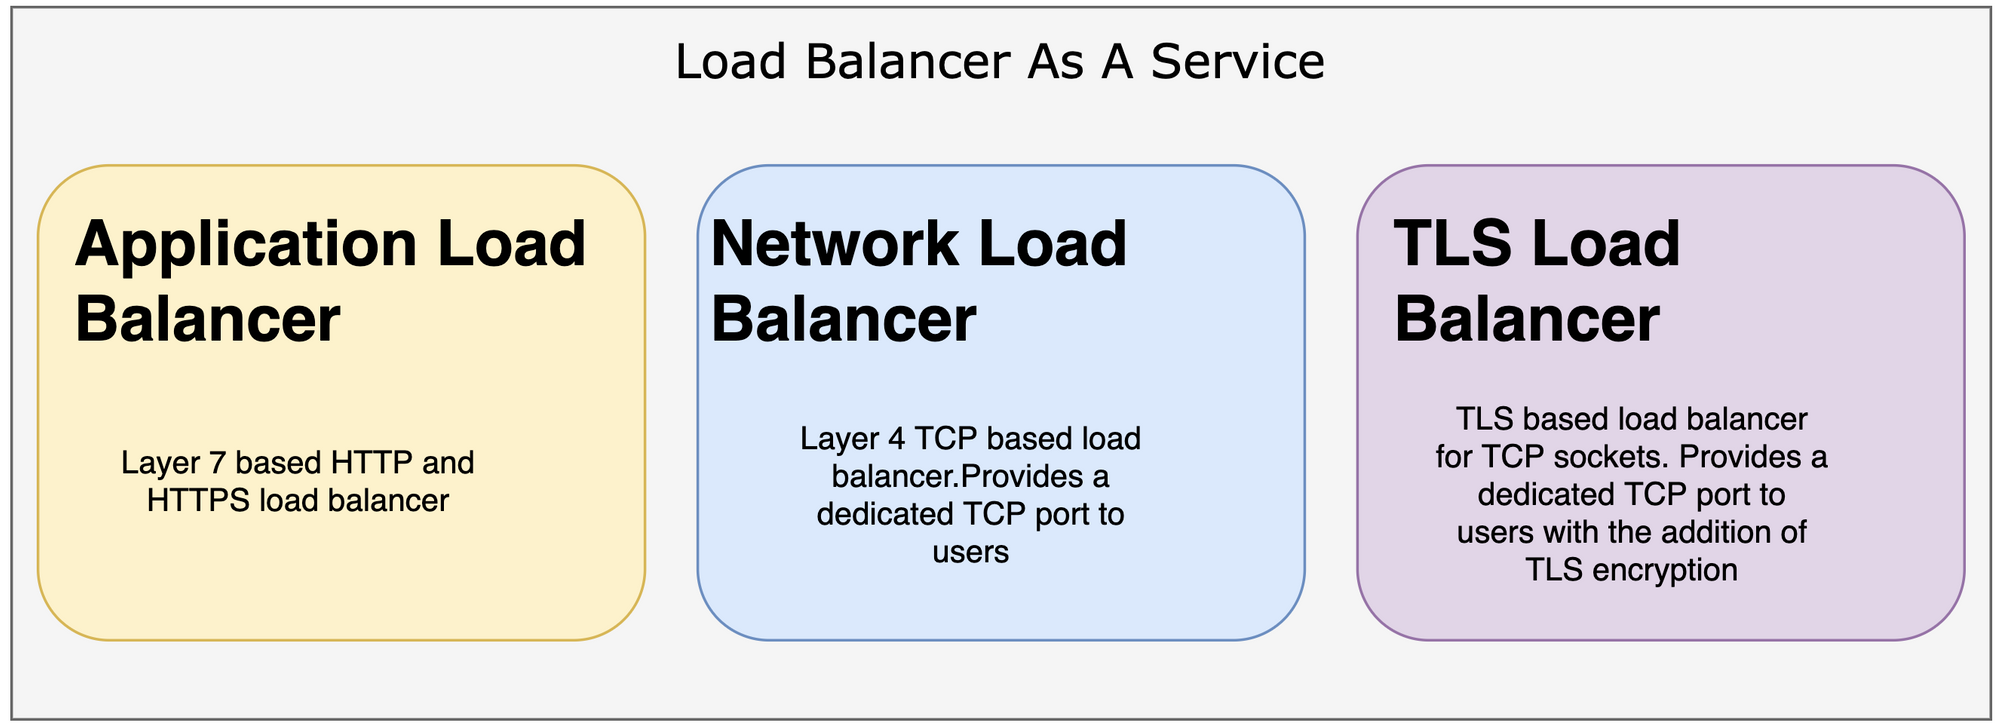
Three types of load balancers
Mysocket today supports three different types of cloud-native load balancers.
1) Application load balancers, for your HTTP and HTTPS services.
2) Network load balancer, for your TCP services.
3) TLS Load balancer, for your TCP services, where we take care of the encryption.
When deploying Mysocket with your services, you now have a new front door. It just happens to be a front door that is anycasted, and as such has many doorbells around the globe made available to you. As a result, you’re always close to your users.
Demo: Creating a multi-region service in two minutes!
Alright, time to get building! In this demo, we’ll continue using the Gif service we built in our last blog. Just like your workloads, I think this is a “critical” service, so we need it to be deployed in multiple regions. The service will need a 100% uptime, which means that even if a region is down, the Gif service will need to be available to our users.
Infrastructure as code
In this example, we’re going to deploy the service on Digital ocean VM’s in two of its regions, New York and Toronto. We’re big fans of infrastructure as code and require our service to be deployed with a simple deploy script. So we’ll use Terraform to spin up the instances and use a cloud-init script to bootstrap the necessary work to install the required software, start the Gif service and connect it to the Mysocket global infrastructure.
Step 1: terraform
We’re using terraform to define what type VM’s we’d like, which regions we want them to be deployed in, and how many per region. For this demo we’re using just two VM’s in two regions. But I’m sure, by just looking at the terraform file, you can see how easy it is to deploy many VM’s per region by just changing the ‘count’ number. It’s also easy to add additional regions. So scaling our Gif service for the future will be easy ;)
Step 2: cloud-init
The VM’s we’re launching are just vanilla Ubuntu machines. So we’ll need to modify them slightly to get our software and our ‘secrets’ on the machine. To do that, we’ll use cloud-init.
Cloud-init allows us to define a set of tasks that need to be executed when the VM is created. In our case, we’re asking it to create a user ‘mysocket’, we’re adding the Giphy API key, and mysocket credentials as secrets to the mysocket home directory. Finally, we’re telling it to download and execute a bootstrap script.
Step 3: bootstrapping and starting our services.
Cloud-init’s last step was to start the bootstrap script that it download from here. Basically, all it does is install the two python packages (mysocketctl and giphy_client) and download and start two more programs. The first program is our Gif application, which will run on port 8000. The second program is a small python script that makes sure the VM registers and connects to the mysocket.io infrastructure.
The code to connect to mysocket is available on github. It’s pretty easy, and I’m sure it’s low friction to get started with, even if you have limited experience. Below are the most important parts:
#These variables were made available as secrets in cloud Init.
username = os.getenv("email")
password = os.getenv("password")
socket_id = os.getenv("socket_id")

#Login to mysocket API and get a token. We can contruct the Auth header using this token.
token = get_token(username, password)
authorization_header = {
   "x-access-token": token["token"],
   "accept": "application/json",
   "Content-Type": "application/json",}

# register the service by creating a new tunnel for this VM
tunnel = new_tunnel(authorization_header, socket_id)
# setup the tunnel to mysocket and ready to serve traffic!
ssh_tunnel(port, tunnel["local_port"], ssh_server, ssh_user)
Make sure you take a quick peak at the code, it’s pretty easy to get started with and a good “getting started” example for both terraform and cloud-init.
And with that, we now have four VM’s in two regions. All four VM’s registered with the Mysocket service and are now serving our ‘critical’ Gif app. You can see the demo service yourself here: https://fluffy-bunny-5697.edge.mysocket.io/
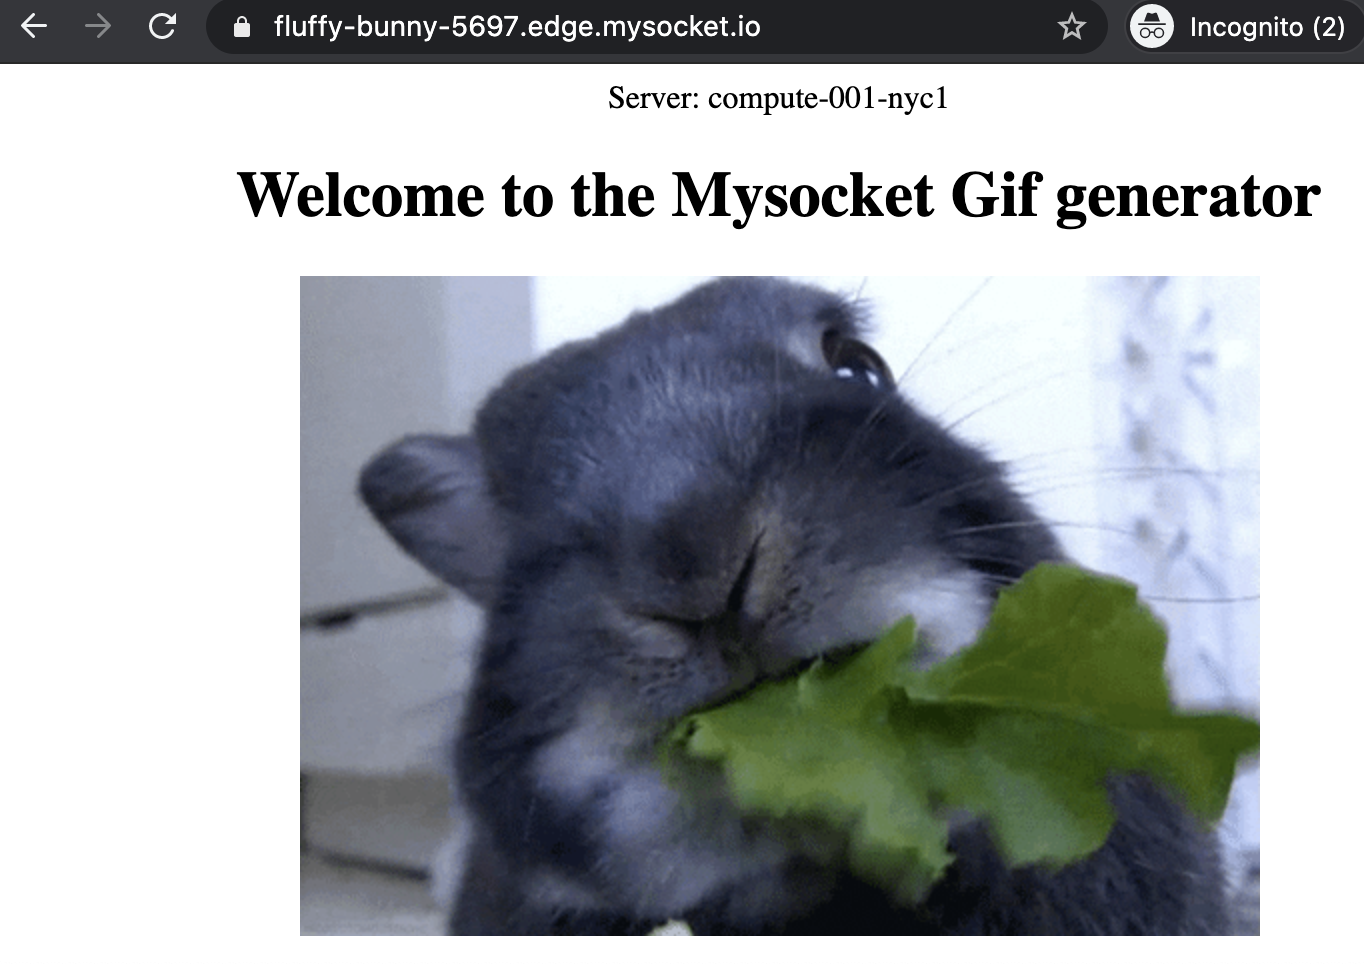
The example below shows how the mysocket load balancing service distributes traffic evenly over all four of the origin servers in New York and Toronto.
$ for i in {1..20}; do  curl -s \
 https://fluffy-bunny-5697.edge.mysocket.io/ | grep Server;
done | sort | uniq -c

   5 Server: compute-000-nyc1
   5 Server: compute-000-tor1
   5 Server: compute-001-nyc1
   5 Server: compute-001-tor1
Horizontally scaling the service is easy; simply change the count number in the terraform file, or add / remove regions. Since the VM’s will call the mysocket api on boot, these new VM’s will automatically become part of the load balancing pool. Pretty neat and easy, right?!
Failover scenarios
So what happens when a server or region becomes unavailable? There are a few things that make this as painless as possible for users. First, the origin service can de-register itself; this will allow for the most graceful scenario.
For less graceful scenarios, mysocket load balancers will, after 60 seconds automatically detect that a tunnel has gone down and take the origin out of the load balancing pool. And even during this 60-second degradation before the tunnel is declared down, our load balancers will use a 10 second connect time out when connecting to origin service and automatically fail back to the remaining origins. So, all in all, failures should be hidden as much as possible from your users.
Wrapping up
In this blog, we looked at how Mysocket can be used as a global load balancer, for your multi-region load deployments. In our demo, we looked at two Digital ocean regions, but this could also be over multiple AWS regions, or even Multi-cloud, with one cluster in AWS, one in Digital Ocean, and throw in some Google cloud for good measure.
We saw how Mysocket provides users with a global anycasted ingress point and provides seamless load balancing for your services. Best of all, it only took us 90 seconds to get all of this going! I guess it’s fair to say that Mysocket makes going multi-region and even multi-cloud easier.